GPS post-processing
Required data#
This tutorial requires:
- Raw logs from the rover
- Raw logs from the base
- (Optional) For absolute positioning: RINEX observations log from a reference station in range of 100 km (60 miles) for RS2 and 30 km (18 miles) for RS+
- (Optional) For processing improvement: precise ephemeris and clock files from the IGS
- RTKLIB
Download the latest version of Emlid RTKLIB QT apps for your system:
| Windows | Linux |
|---|---|
| Download | Download |
| md5 | md5 |
Rover track is calculated relatively to the base station so in order to get rover track with correct absolute coordinates the exact position of the base station should be known. You either need to place base station on a point with known coordinate or determine it by post-processing base against a reference station in static mode.
It is better if the station is in the range of 100 km (60 miles) for RS2 and 30 km (18 miles) for RS+, but longer range might work as well.
Converting raw logs to RINEX (if needed)#
note
If your raw logs from base and rover are saved in .ubx format you should convert them to RINEX. If you already have RINEX logs from the receivers you can skip this step.
Start RTKLIB RTKCONV after downloading raw files from Reach to your PC.
- Add your rover raw log in the first field and choose output directory
- Choose format of your log in pop-down menu. Set format to u-blox if logs were downloaded from each device. Otherwise, choose RTCM3 if base and rover logs were received from rover
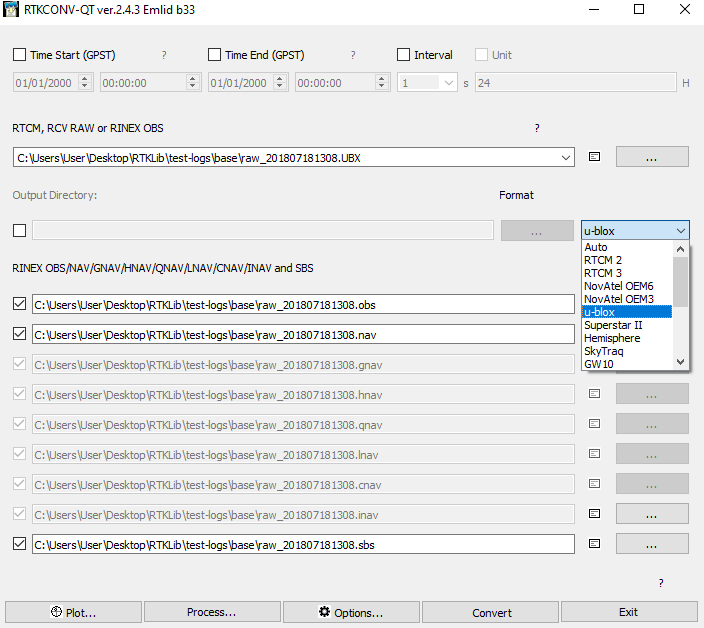
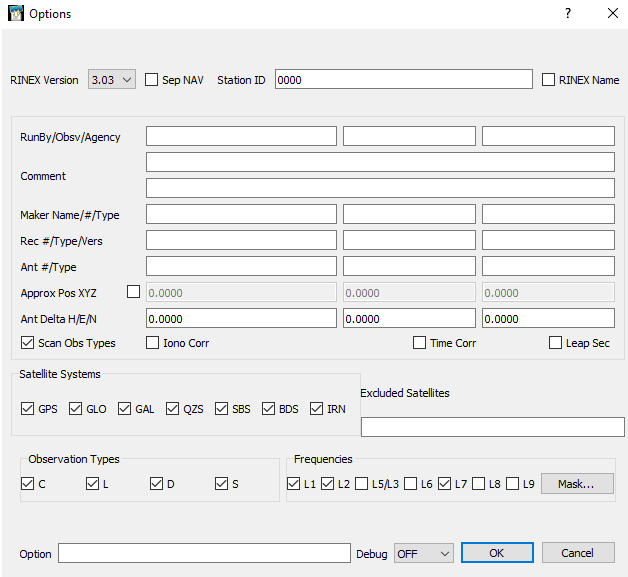
- Push the Options button
- Choose RINEX Version 3.03
- Turn on Satellites Systems you need
- Enable L1, L2, and L7 frequencies in the Frequencies panel
note
The table below shows the correspondence between the RINEX frequencies shown in the RTKPlot and the GNSS signal frequencies. This information is valid for RINEX 2.11 and RINEX 3.03.
| L1 | L2 | L7 |
|---|---|---|
| GPS L1 | GPS L2 | |
| GLONASS L1OF | GLONASS L2OF | |
| Galileo E1-B/C | Galileo E5b | |
| BeiDou B1I | BeiDou B2I | |
| SBAS | L1 | |
| QZSS | L1 |
- Press OK and Convert after
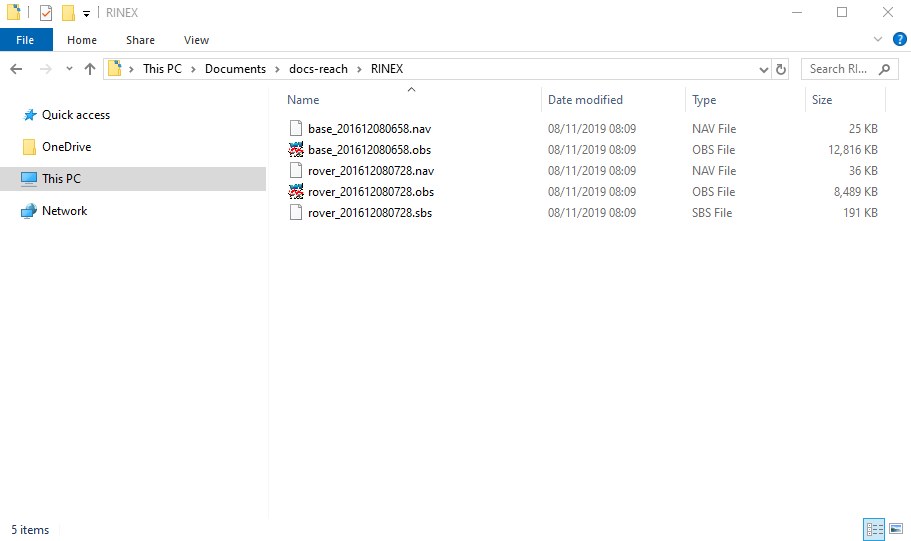
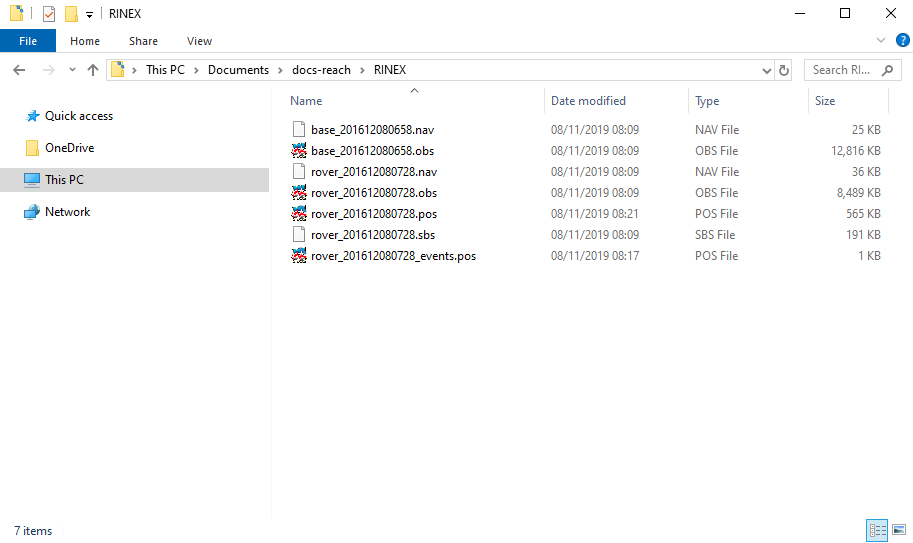
Now you should repeat the same with base log. Do not forget to change format. After that you'll see something similar in your output folder.
Processing in RTKPost#
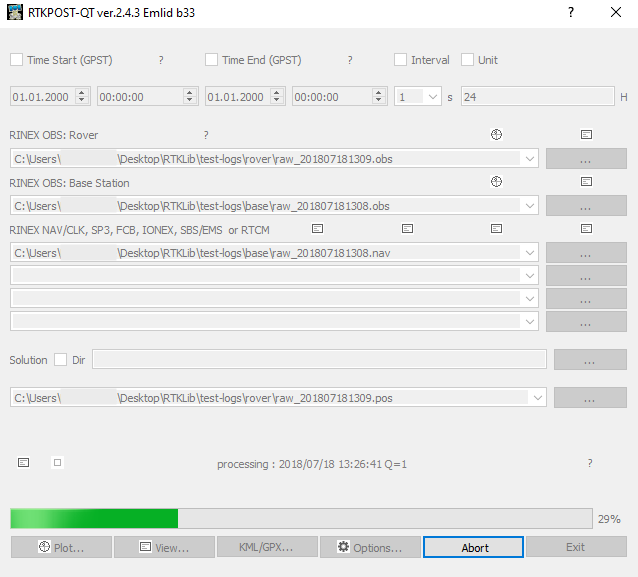
Start RTKLIB RTKPOST software and enter the fields as shown here. If running for the first time you will need to set mode to Kinematic or Static in the options to unlock the fields for base station data. You can skip the start time, it is not compulsory.
- Choose rover .obs file for the Rover field (RINEX file from your rover)
- Select base station .obs file for the Base Station field (RINEX file from your base)
- Put base or rover .nav file in the third field
- (Optional) You can as well add precise ephemeris and clocks at this stage. They are required for long baselines

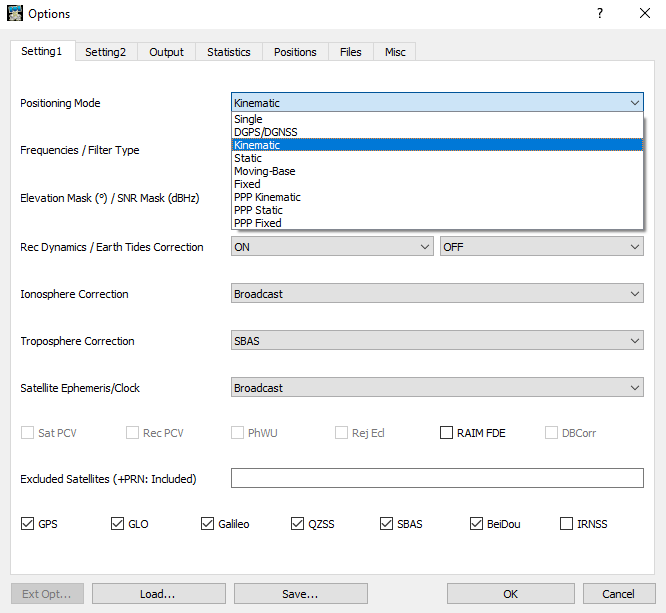
- Now proceed to the options by pushing Options button
- Set the positioning mode you need. Usually, it is Kinematic or Static. Kinematic mode implies that the rover was moving during the positioning process. Static mode assumes that the rover was stationary, which helps to resolve the ambiguities faster as well as produce measurements with higher precision
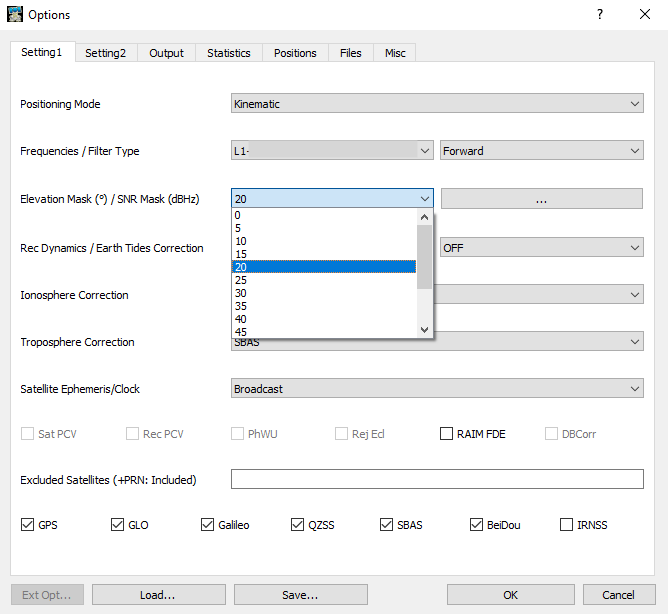
- Choose the Elevation Mask value. Usually it is 15-20
- Push the SNR Mask button and set the value you need. This will help you to avoid satellites with low signal strength
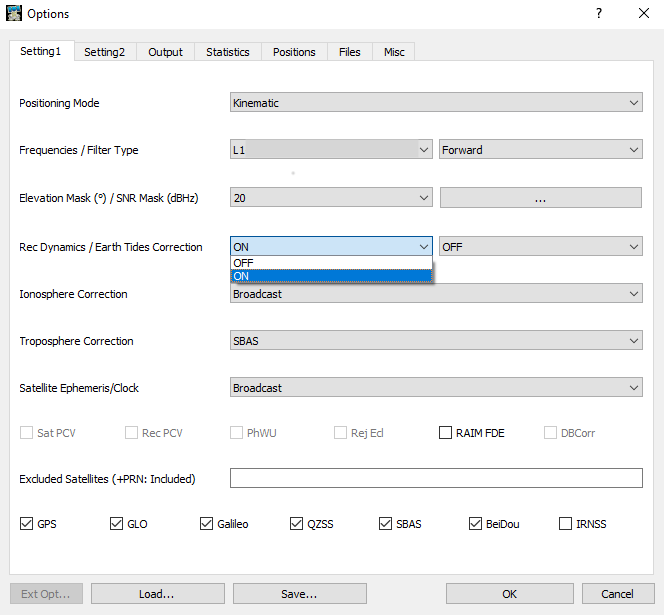
- Turn on Rec Dynamics to estimate receiver velocity and acceleration. Use it for DGPS/DGNSS or Kinematic modes
- Select used navigation systems
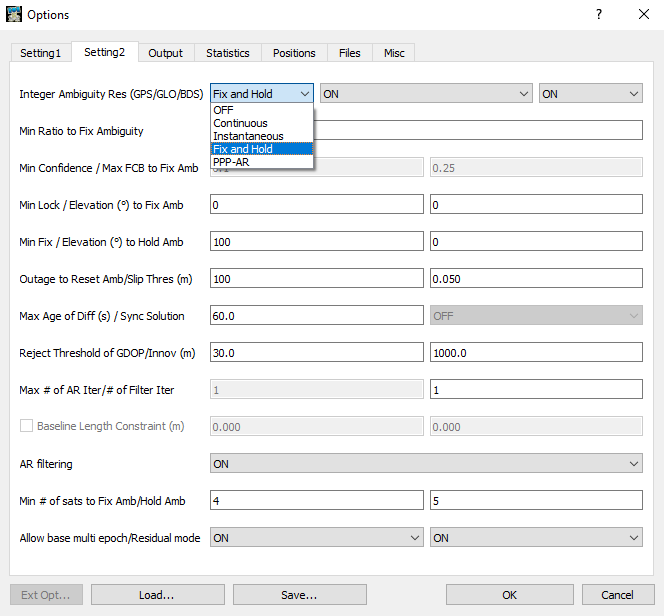
- Go to the Setting2 tab
- Set Integer Ambiguity Res to Fix and Hold. In this mode continuously static integer ambiguities are estimated and resolved. If the validation's OK, the ambiguities are tightly constrained to the resolved values
- Turn on AR Filtering
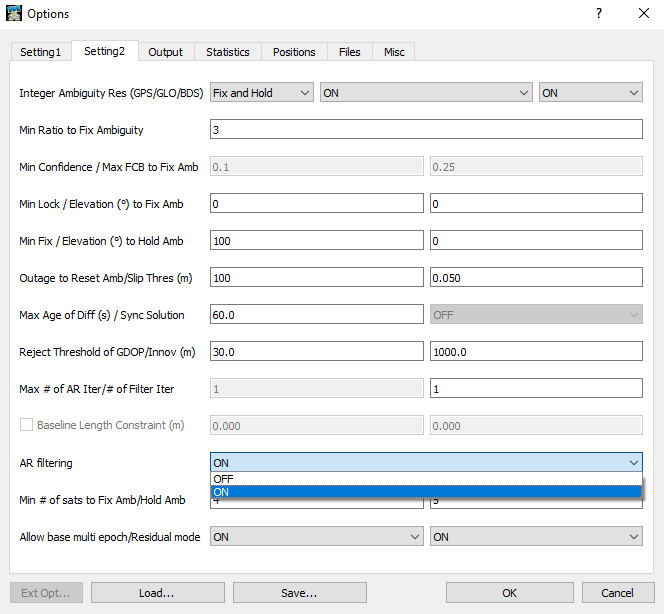
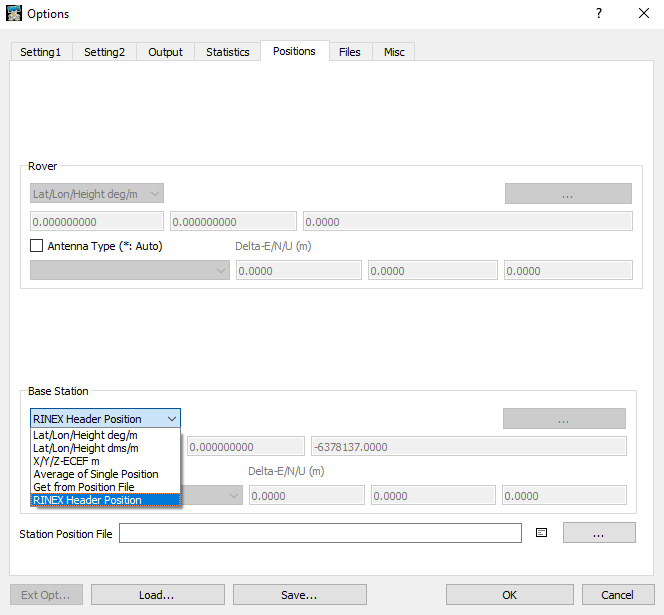
- Switch to the Positions tab
- Select Base Station. Choose Average of Single Position for any log to average single point solution or RINEX Header Position to use approximate position in RINEX .obs header
- Press OK button and Execute in the main window
- You will see green process bar. Wait until Done label. It could take quite a lot of time if your logs are big
After that you will see something similar in your output folder. The .pos file with "__event" will contain timestamps if you had them during your job.
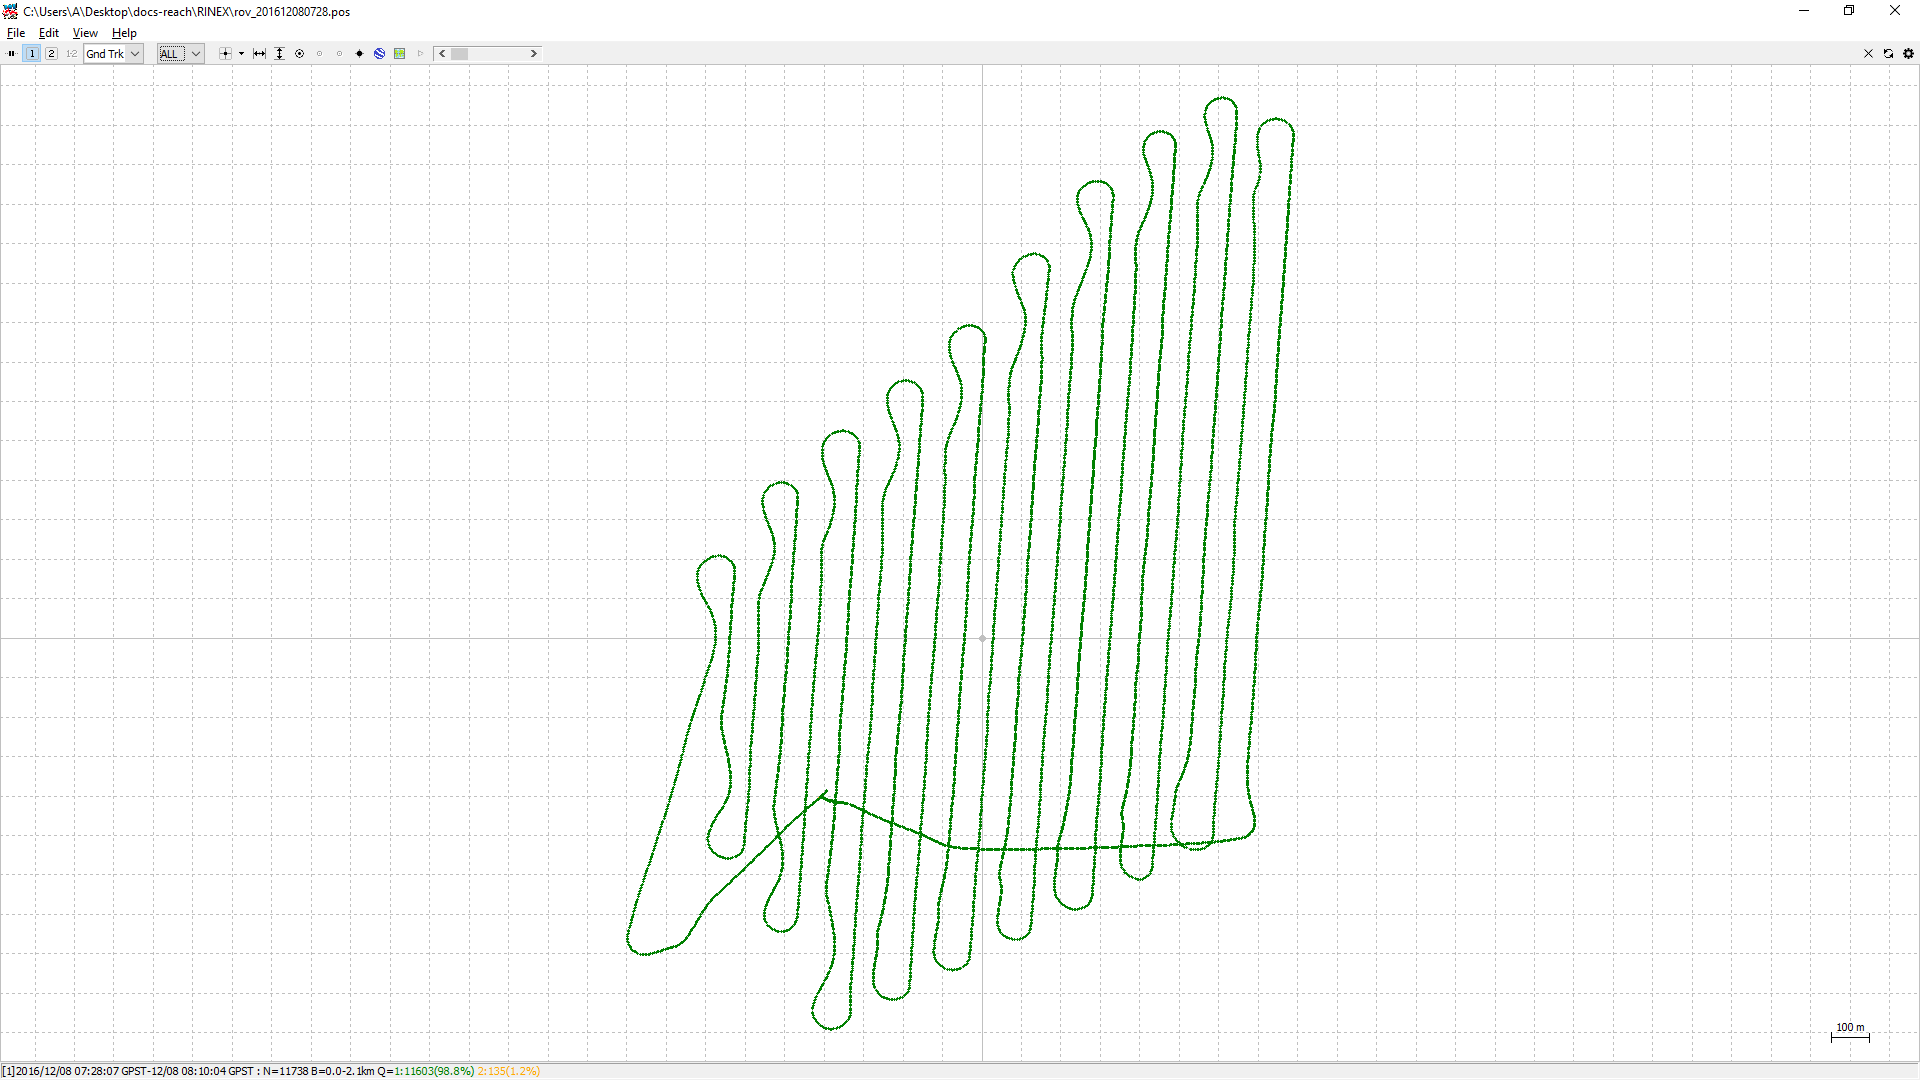
Result visualization and analysis#
Open RTKLIB RTKPLOT and drag and drop your .pos file. If you see green points that mean that they're fix (Q=1), orange mean float (Q=2), red - single (Q=5).
After that you could add .obs file to see more analyzing tools in pop-down menu. For example, first image shows Satellite Visibility and second one Position in 3 directions.

If you have got time marks, add them as a second solution (File > Open Solution-2).
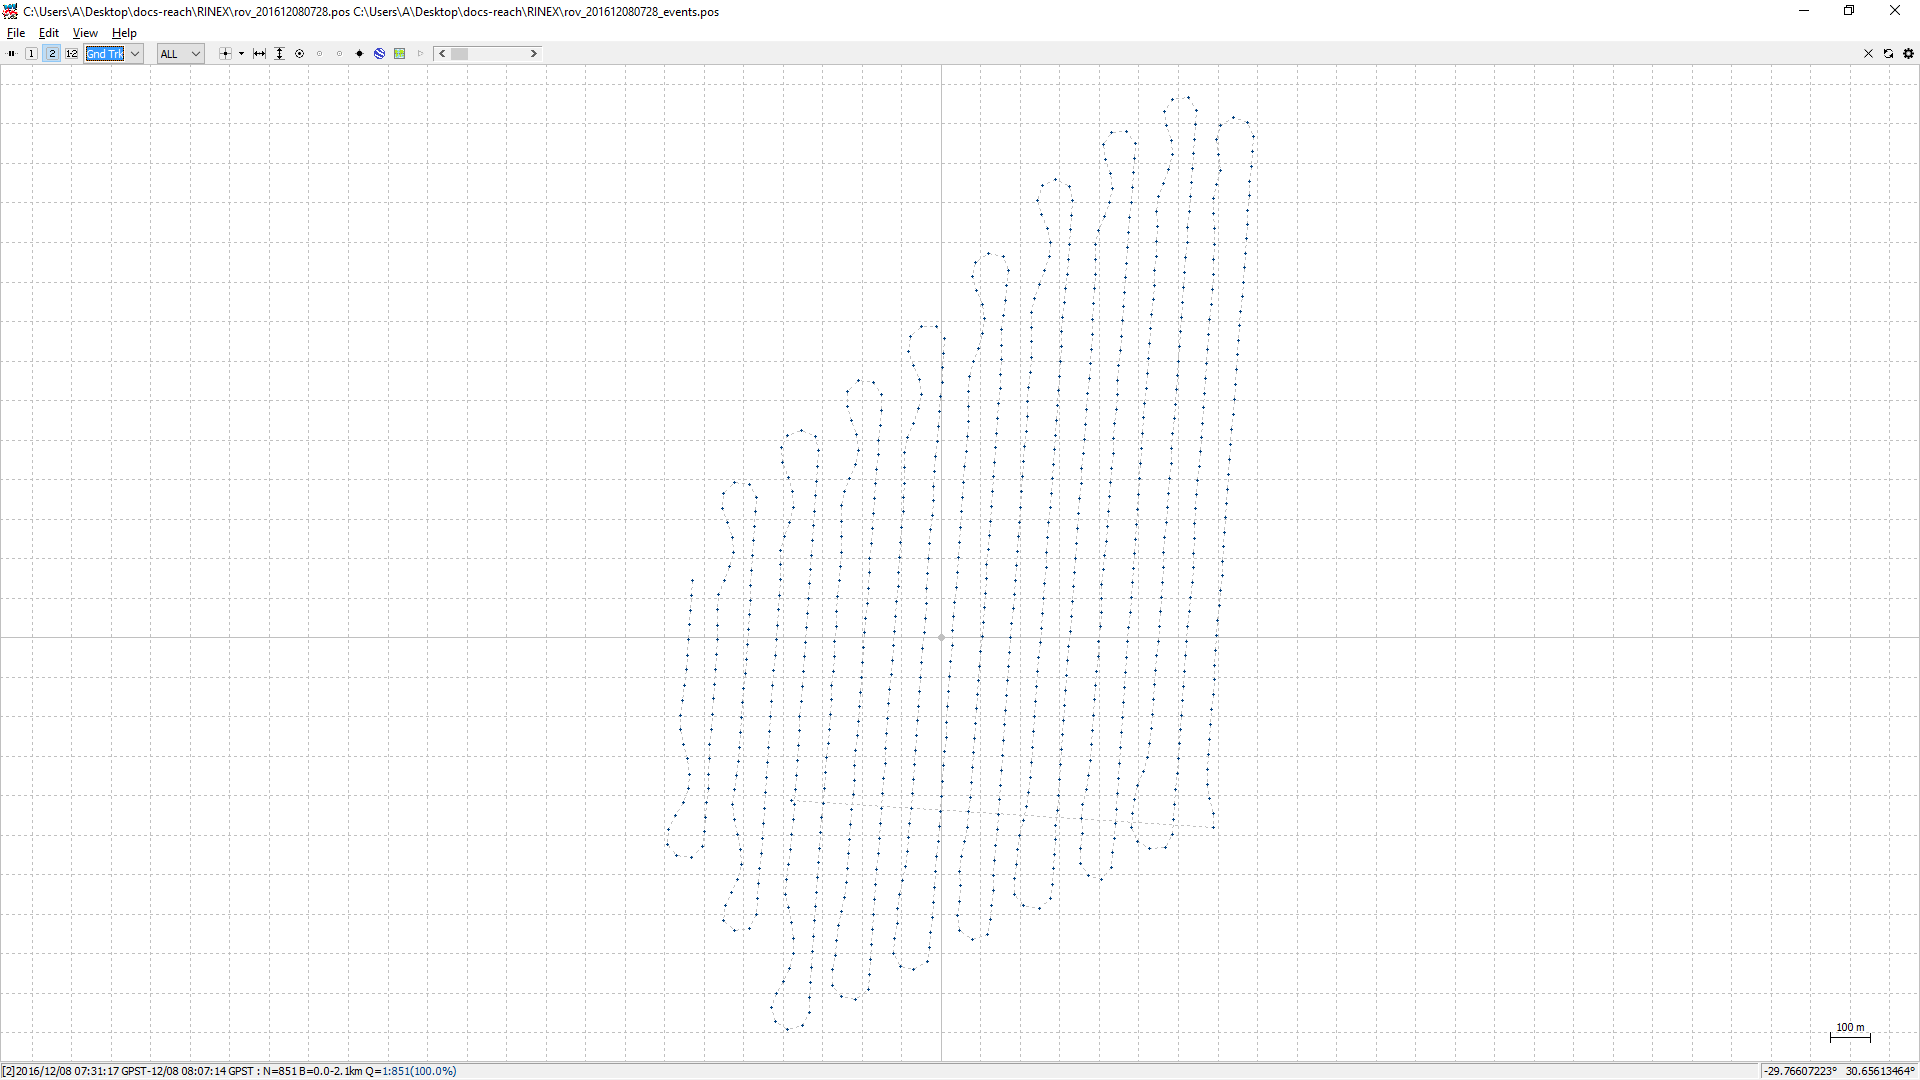
Looks really good, isn't it?
All log rights belong to our good friend and great surveyor Luke Wijnberg.
For more information about options read RTKLIB manual.